

Section 1.1: Geometry Creation
Step 1: Create the reference points
Create 3 points with the coordinates 0 0 0, 0 5 0, 5 0 0 with Explicit Locations, from the Create point tool in the geometry menu (Fig.1.2). To display the point, click on Fit-Window or “x” on the keyboard. If you want to display the point names like in Fig. 1.2 right click on points in the tree model menu and select Show Point Names.

Fig. 1.2 Created points
Step 2: Create the bottom edge
From the Create/Modify Curve menu select the third option Create a Circle or arc from a center Point and 2 points on plane and select the points in the same order as they were created (Fig. 1.3).

Fig. 1.3 Circle created using the points
Step 3: Create the bottom surface
From the Create/Modify Surface menu select the first option Simple Surface with the From 2-4 Curves Method and click on the curve previously created. The result is the surface shown in Fig. 1.4.

Fig. 1.4 Surface done with the curve
Step 4: Copy the geometry to create the top geometry
From the Transform Geometry menu select Transformation tool and select all the geometry done, activating the radio button Copy with Explicit Method using the coordinates 0, 0, 10, for x, y and z, respectively (Fig.1.5).
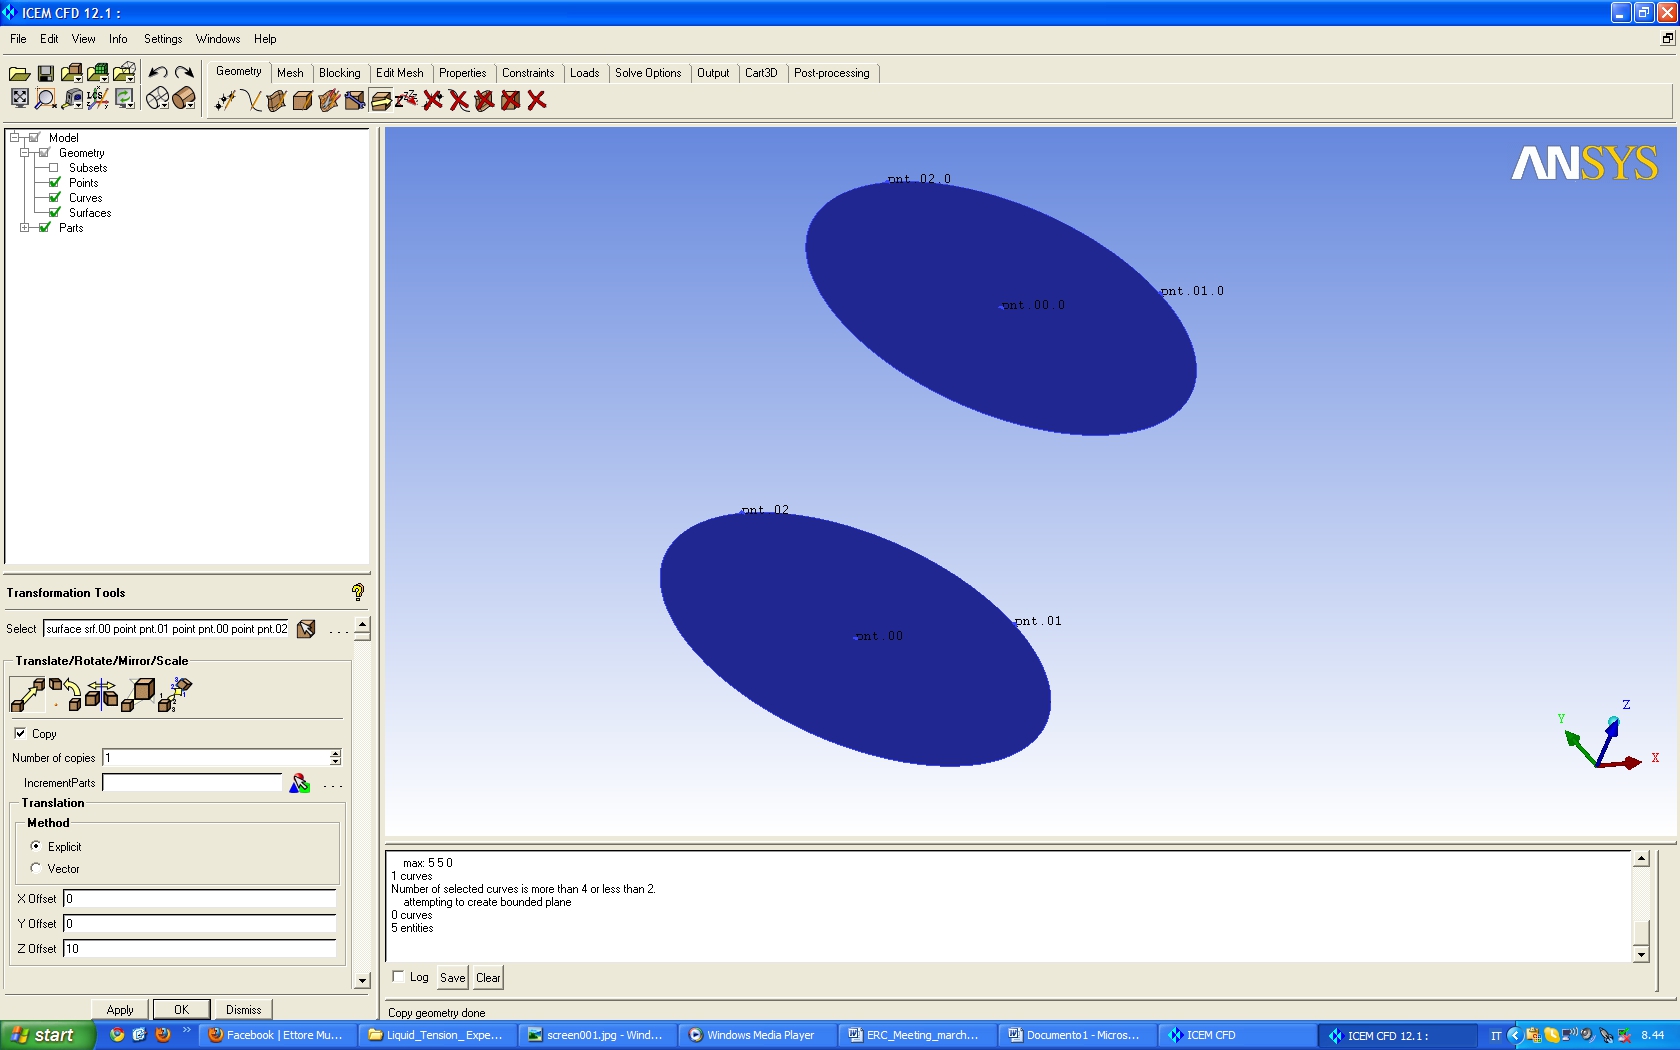
Fig. 1.5 Top and bottom geometry of the Spray- Bomb
Step 5: Create the cylindrical surface
From the Create/Modify Surface use the same option of step 3 and select the two curves shown in Fig. 1.6. With this step the geometry is completed (Fig. 1.7).

Fig. 1.6 Curve selection to create the cylindrical wall
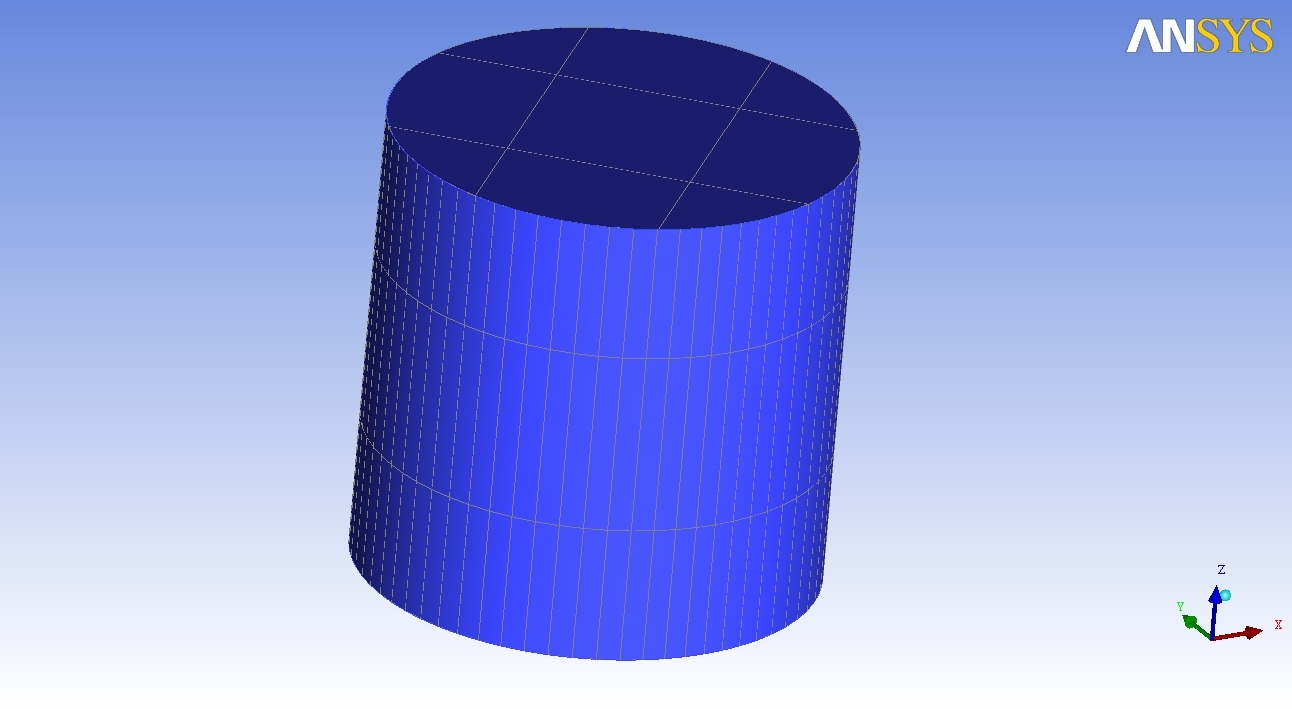
Fig. 1.7 final geometry
![]()
![]()

